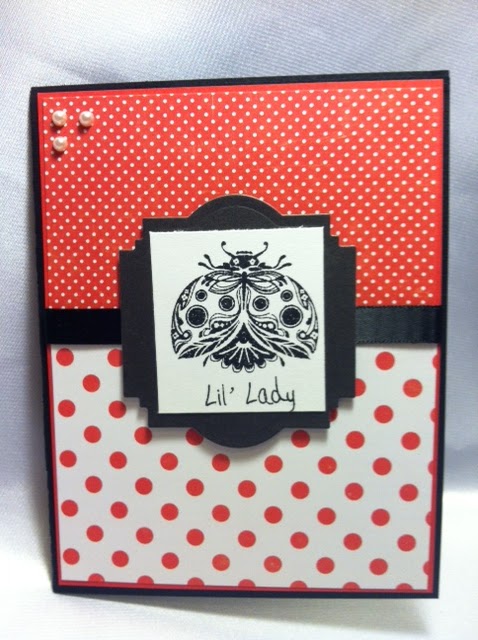
Cards created this year to send to our Nation's Heros....24
Showing posts with label design team. Show all posts

Wednesday, March 19, 2014

Summer Lovin'

  I am super excited to be here with my first Basically Bare Design Team project.  I recently took a winter get away to Key West and wanted to put this picture from the sunset in Mallory Square in a frame.... but not just any frame :)
I started with this one, which was shiny
first
So, I roughed it up a little bit- some sandpaper took the shine off.  I wanted to make sure the papers would adhere well.  Then I added a thick layer of Gesso to help with the 'purchase'.
rough 
I deco'd on little strips of a bright colored paper, but it was just a bit too garish for what I wanted.  My design team good box had some Art Anthology Viridian and it brought just the right amount of sea and sparkle to tone down those colors.  Here, you can see the difference.
mix

This trip was super fun and I wanted the frame to show that off.  And the Basically Bare Camera chipboard piece was perfect!  I started with another thick coat of Gesso and layered on some Velvet Dimensional Paint in Tango.  Then I took some stickers from the paper collection and put the on in a 'stripy' way, to mimick the paper technique.
 orange
That was also given a coat of the Viridian.
  camera
Lastly, I used the circle that was set into the camera to give a bit of a title - and that paint is called Mermaid... no lie!  I said all weekend in the Keys I was a Mermaid, I just had to laugh when I saw that.

sunset
Here is the finished piece.  I am really happy with the mosaic/grunginess of this frame and love looking at it thinking of what a great time was had.
I put up a video with the final piece if you'd like to see it up close and personal   final

Monday, November 11, 2013

Tea Favors

Happy Monday!!
Remember that invite a made a few weeks ago for a tea party?  Well, they liked the invites so much they asked me to make some favors and thank you notes.  So I was off to my crafting table, starting with some Lovebug Product first, of course!!
I made a little package for the tea bag and wrapped it up with Momma's Mesh and other sweet treats.


I started by measuring the tea bag and it fit a 3x4 square with a little over a 1/4 inch all the way around.  So, I cut strips four inches wide by 10 inches long and scored them at 3 and 7.  I wanted the tea bag to show inside a bit and have a flap over the top.


Next, I cut some SU Designer Paper just an /8 of an inch smaller and layered two different patterns for the top and the botton.  I added a half oval punch as a 'finger pull' on the bottom.  The top flap has that cute Tea Riffic seniment from Fiskars layered with my SU punches.
For the bottom I knew I wanted to give it a 'wrapped up' feel... so I grabbed some Momma's Mesh.  I love how that brown looks on the pretty orange.  Next went a simple satin ribbon. 
  I added some flowers and a button with twine as a focal point.  I hot glued this on for two reasons - 1 - I needed something hold the weight of that rosette and 2 - it would seep in through the mesh making a good strong connection to the base.  This allowed me to use the rossette as the closure.  See it pokes up just enough to keep the top flap down.


I am pretty happy with how these turned out.  I think they will bring the tea theme but not take up much space on the table.  Don't forget to hop to Lovebug Creations and pick up some o your own goodies!!
Look - I finally did a video again!!  HERE

Monday, July 15, 2013

Cards In Envy Challenge - three layers

Well, I think my time as a design team member for Cards in Envy is coming to a close. I have learned so much from these women and from all the cards you folks have entered. Sometimes, I sit back and think....life is good! Thank you so much for all the kind comments and support the last six months. I have truly enjoyed my time on this Design Team. I wish I had kept count of how many cards were sent to OWH directly because of this effort, but I can say A LOT! Any way... enough babbling... This month's challenge is three layers.... Me loves some layers! LOVES This card was made with the Authentic 6x6 paper pack. When using several designer papers, I find the packs the way to go. You know they will coordinate nicely.It doesn't show too well on here, but that butterfly is punched out and only adhered on one side so he has a little movement. All right, your turn. Make a card - that fits in a standard envy, link it up and then send it on to Operation Write Home! Thanks!!! Photobucket

Monday, June 17, 2013

Cards In Envy Challenge...Stitch it UP

This month's Cards In Envy challenge is to use some stitching on a card - real or faux... I opted for faux. I found this bicycle stamp on clearance and the sentiment I bought from a crafty friend cleaning out her supplies. I love how bright and cheery this is. Can you see the DP has little bicycles on it? I rarely use two ribbons on a card, but I liked the feel of these two and feel like it added some good texture to the card. I wish I would remember to add that faux stitching more often, it adds such detail. Hope this makes you want to join us!! Remember the only rule is OWH friendly - make it fit in a standard envy with no more than 1/4 inch of thickness. Make a card, link it up and send it to Operation Write Home. Photobucket

Monday, May 6, 2013

Cards in Envy Sketch #6

Are you loving these Operation Write Home friendly sketches?? I am sure am! I am walking in the Avon Breast Cancer walk in June and need a lot of thank you cards (NOT complaining that I have A LOT of generous friends and family who have supported me in the walk) I have been using the sketches and challenges at CIE as inspiration for many of them. This one fit the My Favorite Things image perfectly so I couldn't wait to put it together. Papers by Me and My Big Ideas....no jokes, people!! So hop over to Cards in Envy and link up your card based on this sketch.... then mail it to OWH so some soldier can tell someone back home they are loved. Photobucket

Monday, April 15, 2013

Cards in Envy Challenge #3

This month the Cards In Envy challenge is things with wings...
 

 I use a lot of 'things with wings' in my cards: butterflies, birds, bees so this one was easy for me. The paper is from Echo Park's 6x6 Splash collection. I just love how it naturally had a center point, but I wanted to accent it not to hide it. That is kind of hard given the location. So I decided to make the butterfly just hover over it. For the image, I stamped that beautiful Stampin UP butterfly on white card stock and embossed with white. This allowed me to ink over it with several shades of yellow/orange.

 As you run your dauber over the image, the white lines stay white while the background paper picks up all those pretty tones. I deliberately cut him off center to let more of that inking show and to feel as if he is in motion. Originally, I wanted just the butterfly image, and I don't mind a card without a sentiment - but this one looked naked without. So I layered some punches and placed that off to the side.

Are you inspired??? Remember the only rules for these challenges is the cards should fit in a standard envy with no extra postage. I hope so - make a card, link it up at CIE and send it to Operation Write Home!!
 Photobucket

Friday, April 5, 2013

Distressing Techniques

Life is distressing enough… adding a distressed detail to your paper crafting shouldn’t be!! For this month’s design team project for Lone Wolf Designs I am going to walk you through a few of the techniques I use. I have no doubt there are a lot – A LOT more out there. But these are my go to.
1) Direct to paper. Just like it sounds I rub the ink pad right on top of the paper. I tend to stick to the edges, but sometimes ink it all up. This one is MESSY!
I use this to create a tree trunk look, over crumpled paper it really adds that ‘old’ feel. And it is quick – but that is almost never my goal ;)
This photo has Stampin Up’s Very Vanilla crumpled – on the right it has Walnut stain and the left Tea Dye This is a look at the all over technique – Walnut Stain on the right and Tea Dye on the left again

2) Just softening the edges. I use a lot of matting in my paper projects. I think it makes things look more finished. A soft line on the edge is a way to add another layer and blend your top sheet into the bottom.
On the right I used the ink pad and just lightly stroked it down the very edge of the paper. On the left I used a sponge dauber to just gently pull the onto the paper.
I used whisper white and Tumbled Glass here on the right and Black Soot on the left

 3) Dual Inking.  For a really aged distressed look I have two favorites and I use the walnut stain and vintage photos for bothsides. I used the sponge dauber like above but pulled it in a bit farther. This is the lighter color so I used Vintage Photo.
Then I went over it again with Walnut Stain, only I just covered about half the space from before. Darker to the outside edge of course.

4) Now we are going to get fancy… First… On the right (above) I used an old (older the better) nail file and roughed it up. Sometimes I will add back in a bit of ink if I take off too much. For the left… I get it wet! Tiniest amount of clear water on a flat skinny brush and just barely touch the edge and drag it in a bit. This helps the two inks to mix up and really look like time has been ticking away on the edges.

I give these looks a bit of ink in the focal area as well. Can’t be all crisp and pretty inside with this ragged edges!!

Here is a card I made with the last technique(s) For my mom's birthday:


You can purchase the Distress Inks, ink applicator tools, and hundreds of other craft supplies at 25% off of MSRP at Lone Wolf Designs, LLC! Check it out at www.lonewolfdesignsllc.com. If you're buying your craft supplies anywhere else, you're paying too much!


Photobucket

Monday, March 18, 2013

Cards in Envy Challenge #2

Time for another Cards In Envy challenge. Remember, sketch on the first Monday and challenge on the third. This time we were to use paper strips as ribbon. This is a great way to keep the bulk down on OWH cards. I used the Stampin Up Serene Silhouette image here and a nice purple color I don't play with often. Since it wasn't over the 1/4 of an inch rule we have at Cards In Envy, I added a second paper strip that I used a border punch on. Hope you find the time to play in the challenge and send that card on to Operation Write Home Photobucket

Monday, February 18, 2013

Cards In Envy First Challenge

Here is the first Challenge for Cards In Envy - dots and or stripes. How yummy!!! Twice a month there is something fun to do at Cards In Envy - first Monday is a card sketch and then two weeks later... A challenge. I used a great Inkadinkado stamp I found recently. See all the detail in there - LOVE IT! and a sentiment from My Pink Stamper. I wanted the paper to be the focus since the challenge was dots (or stripes) I was able to make 4 of these for OWH. I find these challenges the best way to fill my OWH box. Remember, the cards should fit in a standard envelope (Envy...get it!!!) and not require extra postage. So go ahead - make your own.... link it up and send it to Operation Write Home!! Photobucket

Wednesday, February 6, 2013

Lone Wolf Design Team!!! First Project

Have you found Lone Wolf Designs on Facebook??? No??? Then you are missing out on some deals! Hurry over to check it out I am on the design team and here is my first project. I picked the Teresa Collins Stationary Noted collection to make a little pocket journal for a friend. This will be used to keep track of food, mood and other good stuff. This collection with graph paper, notebook style and inspirational quotes was perfect! I used the 6x6 pack, envelope collection. And coordinating brads - they all just match so beautifully.
I have some more details and a mini tutorial on the page construction on a video here One of the envelopes was perfect as a page all by itself. The recipient can stuff recipes and lists or notes in it for safe keeping.
Here are a few more details shots
Photobucket

Monday, February 4, 2013

Cards in Envy Sketch#2

First Monday of the month...time for a card sketch challenge at Cards in Envy... Please join us, we would love to have you! Remember the only rule is that the card fit in an A2 envelope with no extra postage...perfect for your OWH box! Such a simple sketch, leaves room for the paper to really shine. I selected a pretty sheet from websters pages. Used a Martha corner punch with a half back pearl. The ribbon is from Paper Bag Lady on Etsy all layered on a pretty black doily. So hope you can make a card, post it and send it on to Operation Write Home. Photobucket

Cards In Envy DT Project Feb 4

Yeah!!! This is my first Design Team card for Cards In Envy
I am so honored to be in this group. Throughout the month I have seen the photos of other member’s cards come in to our little corner of the internet. HOLY COW! You are going to be so inspired by these ladies! I already am – ten times over. Each month there will be a sketch challenge on the first and another more formula/technique kind of challenge on the 15th. And little ole’ me will have one in each!! There will be winners and blog bragging buttons, too! Please make it a point to check it out, join the site and make a card. There are very few rules but one is that the cards have to be flat enough to send with standard postage. This makes them GREAT challenges to inspire my fellow Operation Write Home card makers. Every single card I have made for these so far, straight to the OWH box…several were made a few times over. This month’s sketch was very round in my eye. Well, you know I LOVE my Kanban card toppers. This was a great way to see some of these in action. I added the pink Recollections bling for the smaller round objects. For the little treat in the lower right hand corner, I didn't want to repeat bling and brads weren't right, either. SO I tore off the corner, grunged that up and let three petals of a paper flower fill that element. Finally, this one just needed to be a little more shabby; I went over the card stock with TH’s tea dye ink. All right – your turn, use this sketch, make a card, post it on Cards In Envy and send it to OWH!!
Photobucket

Thursday, January 17, 2013

See Anything new over there>>>>>

Momma made a Design Team!!! Super fun blog with weekly challenges. Sign up - come visit and play along with me!!
Come check us out!!! http://cardsinenvy.blogspot.com/ Photobucket